

As many of us know Artificial Intelligence is considered to be one of the world’s most popular technologies but automation in the world of Ai is something you might have not heard about. Today we are going to discuss one such method to make our Deep Learning Model and adjust its hyperparameters automatically.
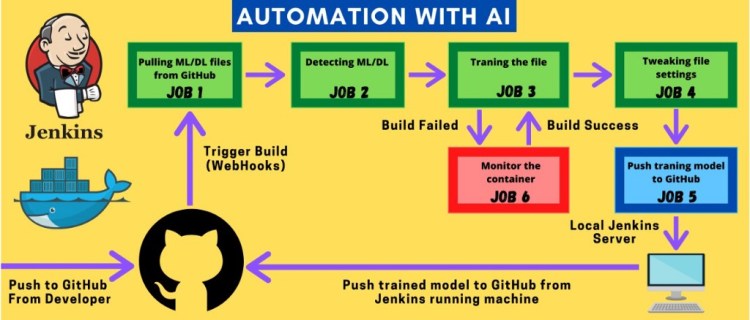
Earlier, we had to manually set the value of each hyperparameter for increasing the accuracy of a deep learning model. But now we can automate the process with the help of DevOps very easily without any human intervention.
To start with the journey of learning we require you to set up your system first.
Pre-requisite:
- Install docker in your system.
https://docs.docker.com/engine/install/ubuntu/
for ubuntu. - Install Git in your system.
https://git-scm.com/book/en/v2/Getting-Started-Installing-Git
Let’s start!!
- We are going to create a docker container with Python, TensorFlow and Keras ( For Deep Learning )
- Python Container with Pandas, Numpy, and Scikit-Learn ( For Machine Learning )
We will initiate by pulling the docker image from our docker repository.
# Command to pull the image for creating Jenkins Container
--> docker pull sarvesh1523/custom_jenkin:v1
# Command to pull the image for creating Deep Learning Container
--> docker pull sarvesh1523/python:dl
# Command to pull the image for creating Machine Learning Container
--> docker pull sarvesh1523/python:ml
Download the above-given container images and run the command given below to check if it’s installed properly.
# Command to check the available images in local registry
--> docker images

.If you are not able to pull the images from the repository, you can create your own image using the Docker file.
Trending AI Articles:
Real vs Fake Tweet Detection using a BERT Transformer Model in few lines of code
Go to the following link and clone the repository it contains two folders Deep learning and Machine_learning which contains DockerFile, requirements.txt, and code.

Change directory to Deep learning → open terminal → Build the Image
cd Deeplearning
docker build -t name:tag .


Once you have finished the above steps, its time to run your Jenkins Docker container. ( for ease of reference we will call it Jenkins Container)
docker run -it --name container_name image_name:tag

Please follow the video completely and install the plugins in the Jenkins as we will require it for the rest of the project.
Now we have to configure our root system for SSH access through Jenkins, Feels overwhelming already don’t worry follow up on the process and you will see it all working in the end.
Steps to configure SSH (Inside Jenkins Container) –
Open your terminal and type the following commands:-
# Command to access the container bash shell(Jenkin Container).
--> docker exec -it container_name bash

# Command to install the required packages to run ssh.
--> yum -y install openssh-server openssh-clients
# Command to create new authentication key pair for ssh(.pub).
--> ssh-keygen
# Command to install an SSH key on a server as an authorized key.
--> ssh-copy-id -i ~/.ssh/id_rsa.pub user@host_ip
Steps to configure Jenkins –
As we know Jenkins is running on the docker container it cannot be accessed to the outside world, to make it publically available we have to convert private IP into the public IP (Tunneling) using ngrok.
https://bin.equinox.io/c/4VmDzA7iaHb/ngrok-stable-linux-amd64.zip
# Command to unzip the ngrok zip.
--> unzip ngrok-stable-linux-amd64.zip
# Command to tunnel the private ip.
--> ./ngrok protocol port

Our pre-requisite setup is finished, Great!.
Now let’s move onto the jobs we have to set up for our Jenkins.
First start Jenkins using the following commands, enter your Id and Password.
# Command to start the Jenkin Container using downloaded Image.
-->docker run -it --name name sarvesh1523/custom_jenkin:v1

JOB 1 –
Here we will pull the repository from our GitHub Using WebHooks and Jenkins then we will copy the fetched file which is saved in the workspace of Jenkins to the host mounted folder.
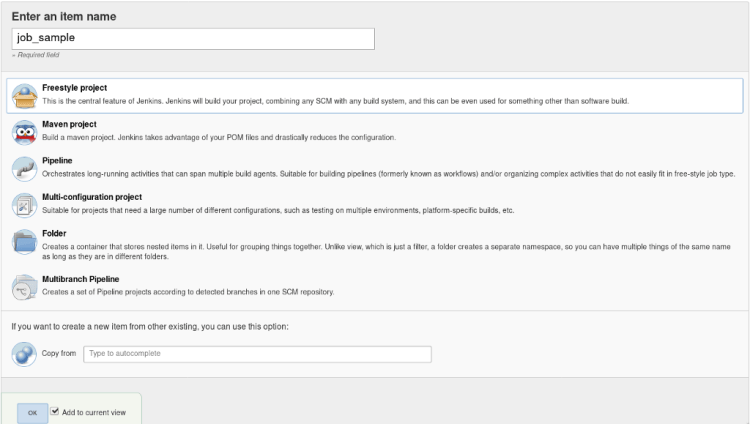
Click on the new item in the dashboard, give the appropriate name here for the demo we will be using the name “job1”.
- Create a freestyle project named “job1”
2. Inside the General setting click on the GitHub project and copy the repository link in the given below tab as shown in the image given below and add a description to your job, So that you can refer later to it.
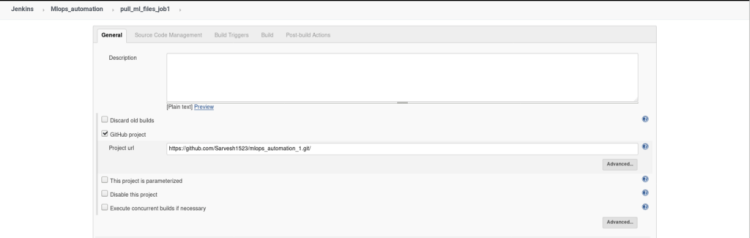
This is an optional step it just gives you an extra option in the dashboard of this particular job to directly open your GitHub account and review changes.
3. Inside Source & Management select Git
Enter Repository Url- “enter the repository URL”.
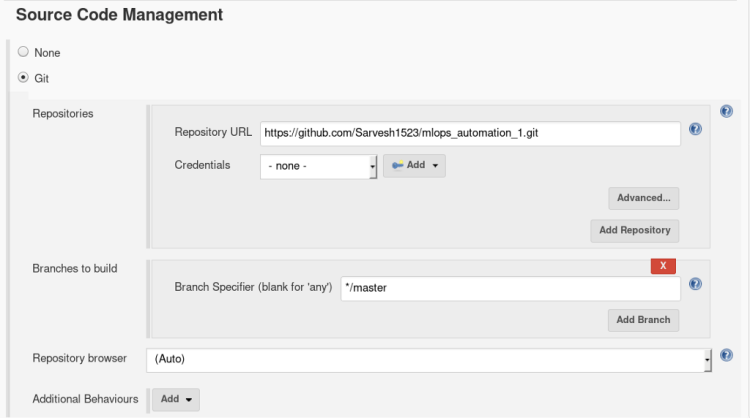
we don’t have to provide any external credentials right now as Git plugins will direct Jenkins to take actions.
4. In Build and triggers select Github hook trigger for GTScm polling.
This trigger will inform Jenkins whenever there is a change in the repository
in the meantime
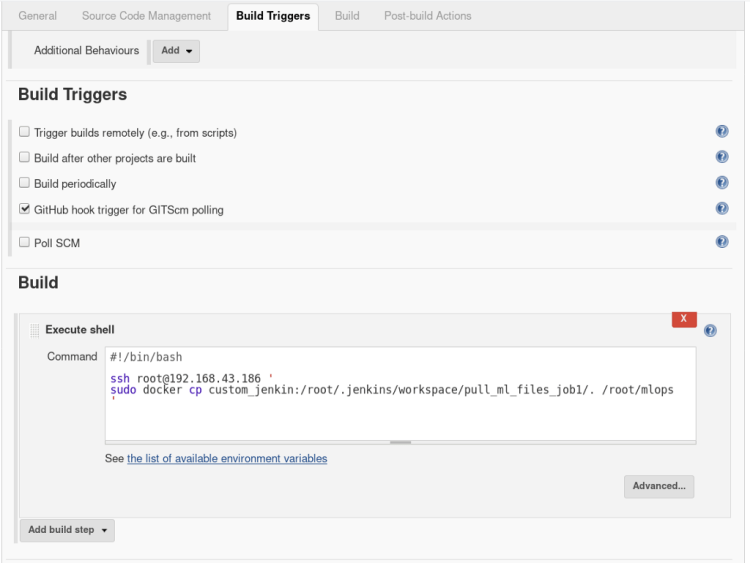
In build, option open the drop-down menu > select Execute shell
and type the following commands
# Command that indicate what kind of interpreter to run.
#!/bin/bash
# Command to SSH to host and copy all the files from job1 workspace to host mounted folder.
ssh user@host_ip '
sudo docker cp custom_jenkin:/root/.jenkins/workspace/pull_ml_files_job1/. /root/mlops
'
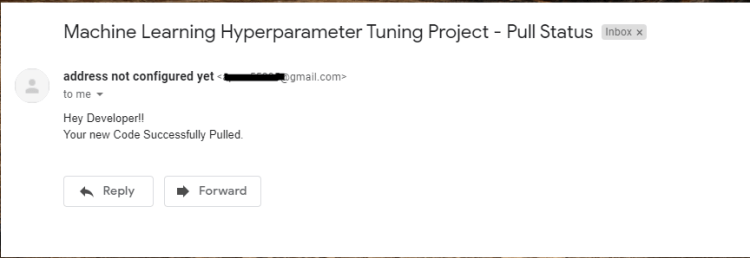
5. If you want to notify your user that your build was successful or not through the email you can use Post Build Action, this step is Optional.
Inside Post-build Actions select > Editable email notification.
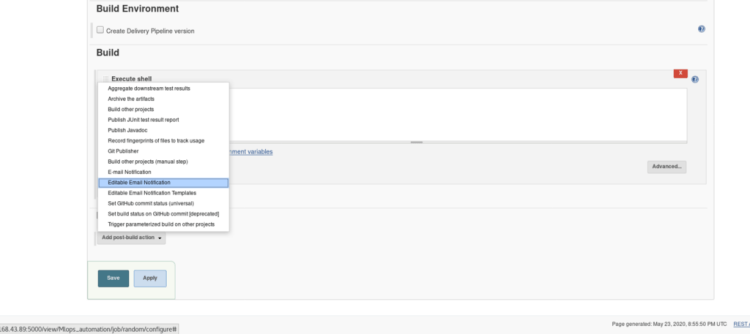

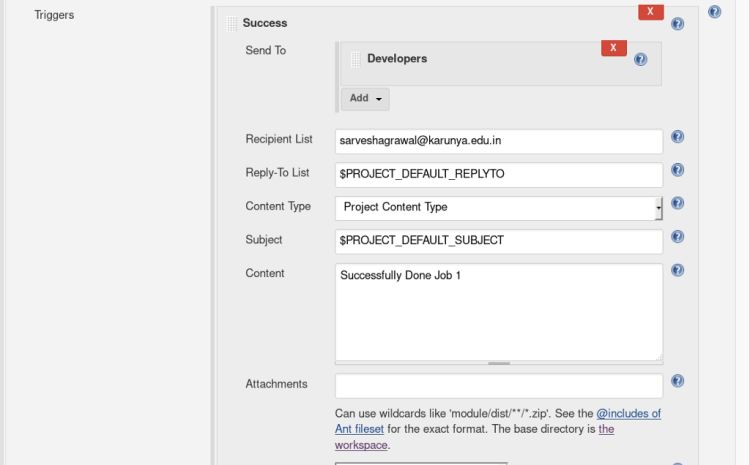
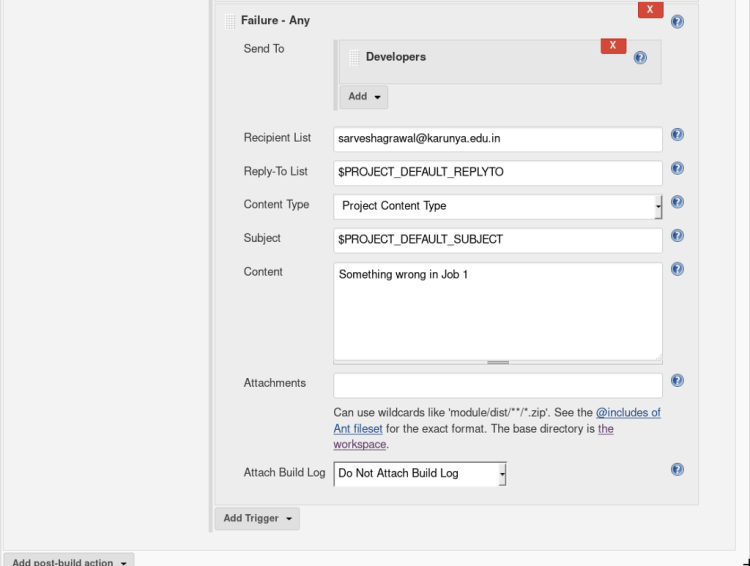
Select Advanced Settings option inside Editable email notification, A new menu will pop up > Select when to activate the trigger.

Enter the Recipient mail address in the recipient list and content as shown below.
Amazing you have completed Job 1! ? Let’s move on next job
JOB 2-
This job will get triggered automatically after job 1 is done confused about how it will happen? we will soon see how It works.
In this job, we are going to perform a check whether the provided data & code require a Deep learning container or Machine Learning container. Based on that we will create an empty file Named ‘ML’ or ‘DL’ inside a separate folder.
This folder will be used later to fetch our ML/DL code to run into the specified container.
1. Click on the new item from the dashboard, Create a freestyle project named “job 2” (similar to job 1)

2. Inside build triggers select > Build after other projects are built, insert name of the project to watch in this scenario we will name our project “job1”.

In build open the drop menu > select Execute shell
and type the following commands
#!/bin/bash
ssh root@192.168.43.186 '
cd /
cd root/mlops
# Checking whether the code is for ML or DL(by searching the library used for ML and DL in code).
# If the code is written for DL then creating empty file DL or if ML then creating empty file ML.
ML=$(cat file.py | grep sckit-learn | wc -l)
DL=$(cat file.py | grep keras | wc -l)
if [[ $ML > 0 ]]
then
touch ML
elif [[ $DL > 0 ]]
then
touch DL
else
exit 1
fi
'
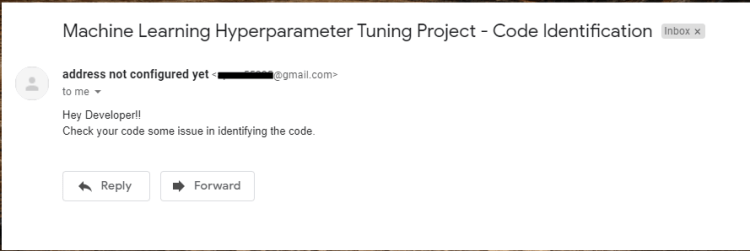
3. If you want to notify your user that your build was successful or not through the email you can use Post Build Action, this step is Optional. ( refer JOB1 step-5)

When job 2 is finished we will have either have DL or ML file Based on the libraries used inside the code.
you have completed Job 2! Let’s move on to the next job
JOB 3-
In this job, we will launch the container for deep learning if a saved file from the previous job is DL or we will launch the container for Machine learning if a saved file from the previous job is ML.
The key factor that decides the type of container to be used is the libraries available inside the code for our model.
Keras and TensorFlow for Deep learning
scikit-learn for Machine learning
Once the container is launched it will run the initial code in the container and if any interrupt or failure occurs in between the execution of job 3, it will report it to job 6.
If there is no fault occurrence it will create a file inside the same folder as ML/DL named “target score”
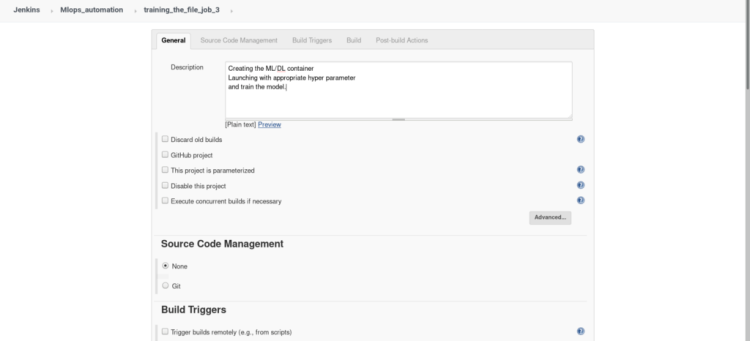
- Click on the new item from the dashboard, Create a freestyle project named “job 3” (similar to job 1), Add description of your job in short words.
2. Inside build triggers select > Build after other projects are built, insert name of the project to watch in this scenario we will name our project “job2”.
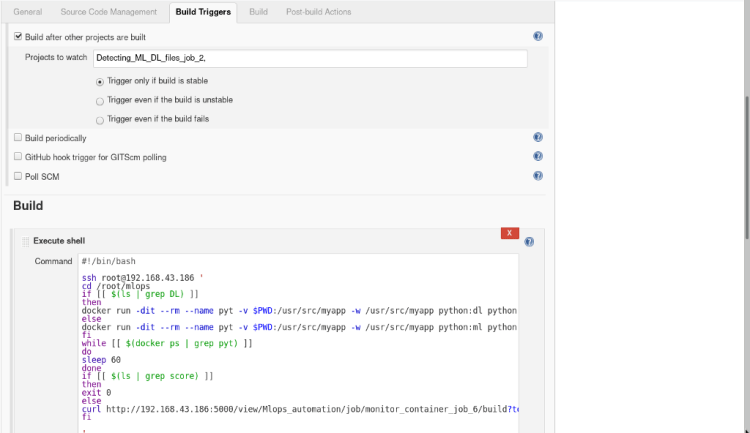
In build open the drop menu > select Execute shell
and type the following commands
#!/bin/bash
ssh root@192.168.43.186 '
cd /root/mlops
# Checking the file created in last job whether DL or ML.
if [[ $(ls | grep DL) ]]
then
# -d   : running the container in detach mode.
# -it  : interactive terminal(to get terminal).
# --rm : Container terminate on finishing the work(lifetime).
# -v   : Mounting current workdir of root to container workdir.
# -w   : Explicitly telling the workdir for container.
# training model with default values(Epoch= 1, Layer= 1)
docker run -dit --rm --name pyt -v $PWD:/usr/src/myapp -w /usr/src/myapp python:dl python file.py
else
docker run -dit --rm --name pyt -v $PWD:/usr/src/myapp -w /usr/src/myapp python:ml python file.py
fi
# make the job wait until training finished
while [[ $(docker ps | grep pyt) ]]
do
sleep 60
done
if [[ $(ls | grep score) ]]
then
exit 0
else
# if incase container stops trigger the job6(monitoring job).
curl
http://192.168.43.186:5000/view/Mlops_automation/job/monitor_container_job_6/build?token=monitoring
fi
'
3. If you want to notify your user that your build was successful or not through the email you can use Post Build Action, this step is Optional. ( refer JOB1 step-5)
you have completed Job 3! Let’s move on to the next job
JOB 4-
It will automatically get triggered once Job 3 is done, This Job will go to the Host and check whether the given file created in the last Job is ML or DL based.
If the file is found to be DL based it runs a loop until the desired accuracy > actual accuracy or epoch <=10 using 1 epoch and 1 layer as default value in the first iteration. Once it reaches the Layer of neurons up to 3 it starts changing the number of epochs only.
It waits until the machine gets trained in the background and check if the desired accuracy is met or not, this job automatically Changes the parameter, remove the container and re-run with newly updated parameter increasing layer as well as epochs layer by a factor of 1 with every iteration.
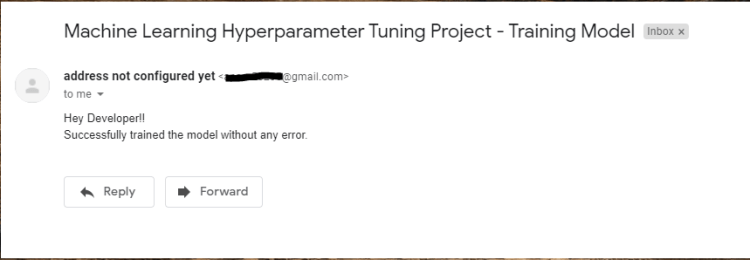
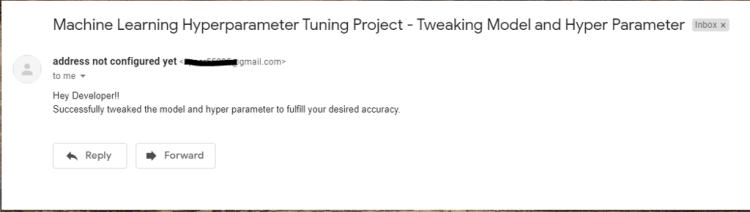
Once the desired accuracy is attained then it successfully exits from the loop or exit with an error in either condition the developer receives a mail of success or failure.
- Click on the new item from the dashboard, Create a freestyle project named “job 4” (similar to job 1), Add description of your job in short words.
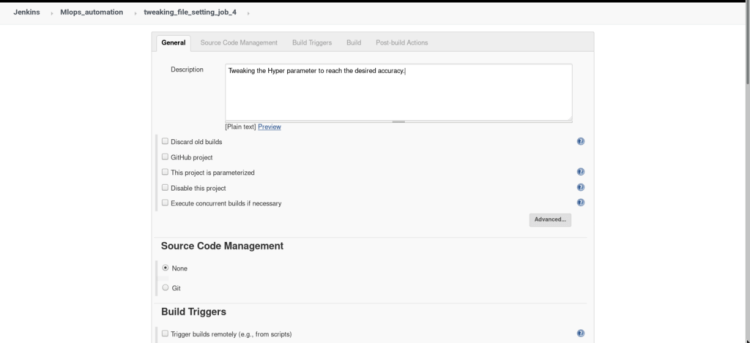
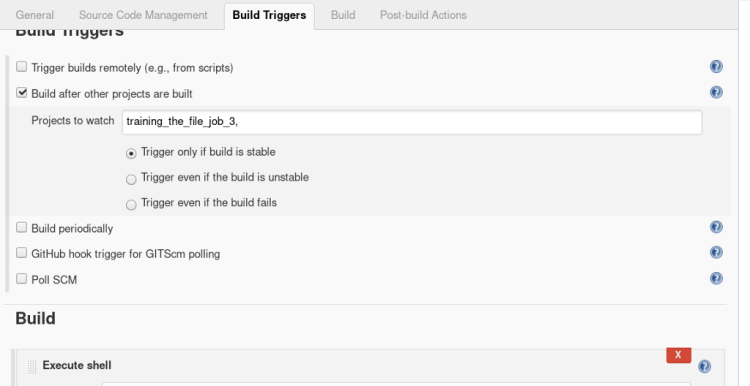
2. Inside build triggers select > Build after other projects are built, insert name of the project to watch in this scenario we will name our project “job3”.
3 In build open the drop menu > select Execute shell
and type the following commands.
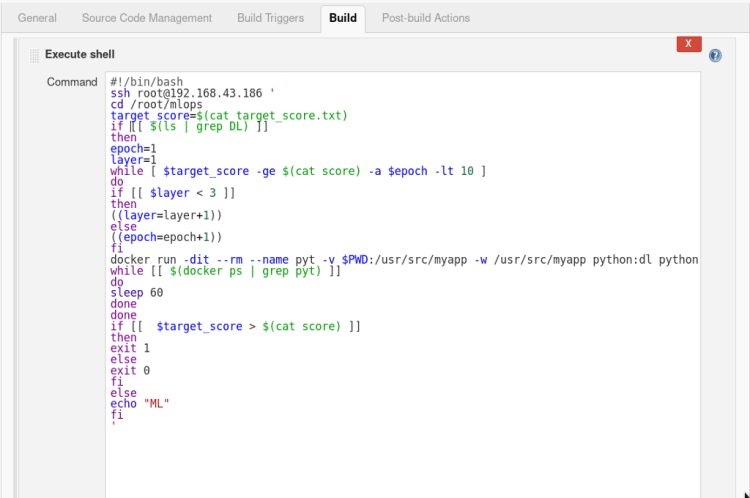
#!/bin/bash
ssh root@192.168.43.186 '
cd /root/mlops
# Desired Accuracy
target_score=$(cat target_score.txt)
if [[ $(ls | grep DL) ]]
then
epoch=1
layer=1
# Process continues until reach the desired accuracy or 10 epochs.
# Each time adding 1 more set of layer once count reached 3 layers then changing no. of epochs.
while [ $target_score -gt $(cat score) -a $epoch -lt 10 ]
do
if [[ $layer < 3 ]]
then
((layer=layer+1))
else
((epoch=epoch+1))
fi
# Passing the no. of epochs and layers as a argument.
docker run -dit --rm --name pyt -v $PWD:/usr/src/myapp -w /usr/src/myapp python:dl python file.py -l=$layer -e=$epoch
while [[ $(docker ps | grep pyt) ]]
do
sleep 60
done
done
# If incase model stopped tunning because it reaches the no. of max epochs then exit failure or if reached the desired accuracy then exit with success.
if [[  $target_score > $(cat score) ]]
then
exit 1
else
exit 0
fi
else
echo "ML"
fi
'
4. If you want to notify your user that your build was successful or not through the email you can use Post Build Action, this step is Optional. ( refer JOB1 step-5).
you have completed Job 4! Let’s move on to the next job
JOB 5-
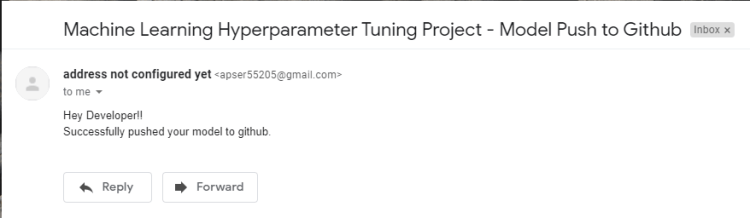
Once Job 4 is successfully built it clones the 2nd repository from GitHub inside a folder inside the root.
Copy the model and accuracy rate into the .git directory and push it to your remote GitHub account.
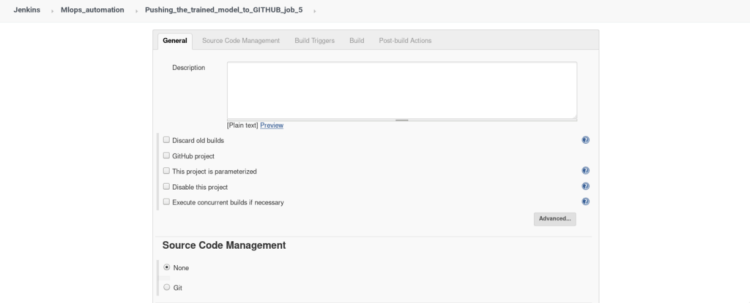
- Click on the new item from the dashboard, Create a freestyle project named “job 5” (similar to job 1), Add description of your job in short words.
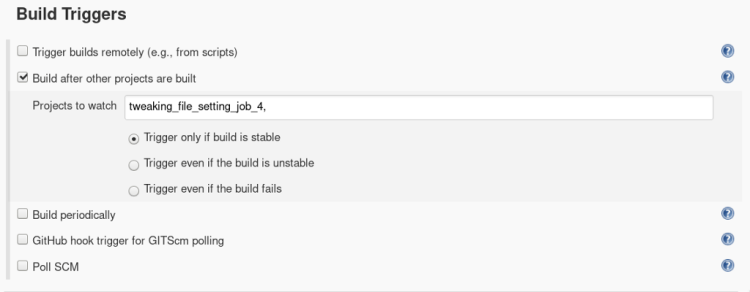
2. Inside build triggers select > Build after other projects are built, insert name of the project to watch in this scenario we will name our project “job4”.
3. In build open the drop menu > select Execute shell
and type the following commands.

#!/bin/bash
ssh root@192.168.43.186 '
cd /root/mlops
# cloning the repository in which we want to push model and accuracy.
git clone https://github.com/Sarvesh1523/mlops_automation_2.git
sleep 10
# Copying model and accuraccy in cloned dir.
cp mnist_model.h5 /root/mlops/mlops_automation_2
cp Actual_score.txt /root/mlops/mlops_automation_2
cd mlops_automation_2/
sleep 2
# Adding the model annd accuracy_file, committing the changes in remote repository, and pushing changes into remote repository.
git add mnist_model.h5
git add Actual_score.txt
sleep 2
git commit -m "Uploading trained Model and score"
sleep 2
git push
'
you have completed Job 5! Let’s move on to the next job
JOB 6-
Job 6 will be remotely triggered if something is wrong in a container while running job 3, if the container stopped due to any reason it will again initiate the container and start training the machine.
- Click on the new item from the dashboard, Create a freestyle project named “job 4” (similar to job 1), Add description of your job in short words.
2. Inside build triggers select > Trigger builds remotely, Insert Authentication token Here we have put token as “monitoring” to build our job remotely from any external resource.
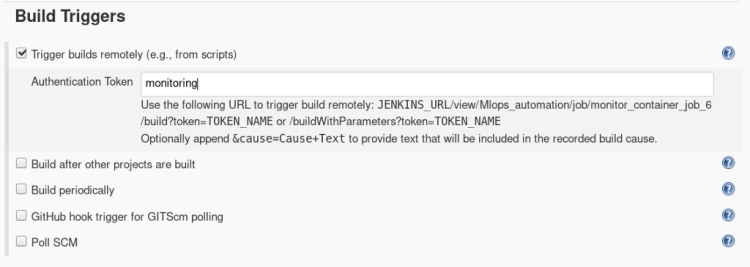
A Trigger builds remotely can be used from anywhere in the network if Jenkins is also running on the same network to build our Job 6.
http://host_ip:5000/view/Mlops_automation/job/monitor_container_job_6/build?token=monitoring
3. In build open the drop menu > select Execute shell
and type the following commands.
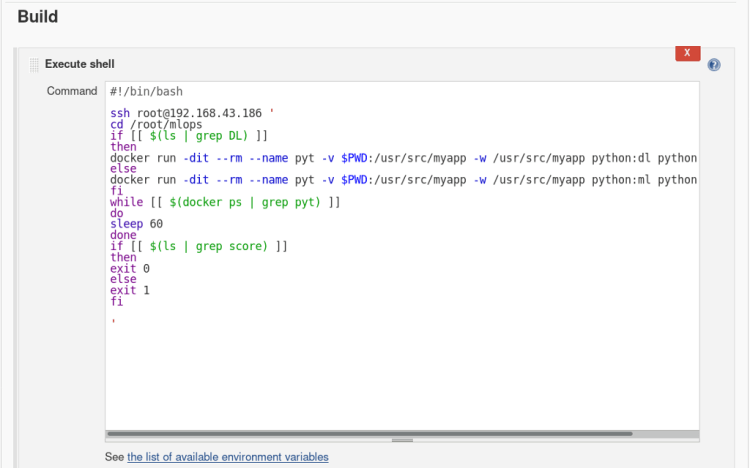
# Same as job3 which will be called by job3 on failure
#!/bin/bash
ssh root@192.168.43.186 '
cd /root/mlops
if [[ $(ls | grep DL) ]]
then
docker run -dit --rm --name pyt -v $PWD:/usr/src/myapp -w /usr/src/myapp python:dl python file.py
else
docker run -dit --rm --name pyt -v $PWD:/usr/src/myapp -w /usr/src/myapp python:ml python file.py
fi
while [[ $(docker ps | grep pyt) ]]
do
sleep 60
done
if [[ $(ls | grep score) ]]
then
exit 0
else
exit 1
fi
'
Amazing you have completed all the Job!?
How to Run
In this racing world, even technologies like Artificial intelligence also need to be automated as the world is becoming faster and sharper, We have to equip ourselves with such technologies to create a better future.
It was a great pleasure for us to write this article this took some time but it has helped us in understanding the concepts more clearly than before, This article cannot be completed without mentioning the name of our great Mentor Mr.Vimal Daga who helped us in understanding the concepts of combining the power AI and DevOps to create this project.
WE HOPE YOU HAVE LEARNED SOMETHING NEW! ?
Leave a comment, or contact us for any doubts at
? TechBoutique.official@gmail.com
Don’t forget to give us your ? !


Automation in AI World was originally published in Becoming Human: Artificial Intelligence Magazine on Medium, where people are continuing the conversation by highlighting and responding to this story.
Via https://becominghuman.ai/automation-in-ai-world-6d69e2810360?source=rss—-5e5bef33608a—4
source https://365datascience.weebly.com/the-best-data-science-blog-2020/automation-in-ai-world
