
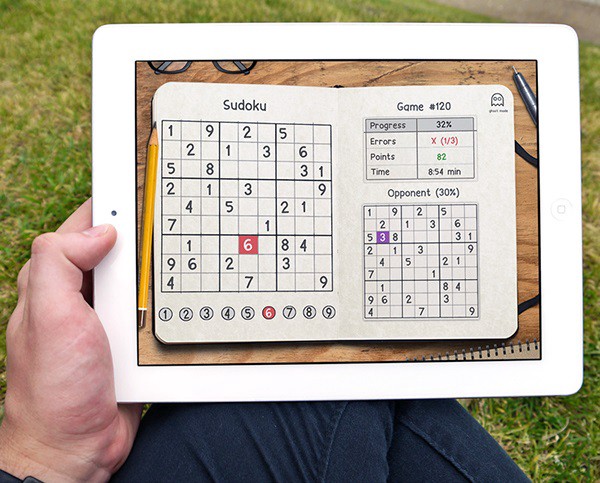
Sudoku Solver AI with OpenCV
We will be creating a Sudoku Solver AI using python and Open CV to read a Sudoku puzzle from an image and solving it. There a lot of methods to achieve this goal. Thus in this series, I have compiled the best methods I could find/research along with some hacks/tricks I learned along the way.
This article is a part of the series Sudoku Solver AI with OpenCV.
Part 1: Image Processing
Part 2: Sudoku and Cell Extraction
Part 3: Solving the Sudoku
Steps
- Import the image
- Pre Processing the Image
2.1 Gaussian blur: We need to gaussian blur the image to reduce noise in thresholding algorithm
2.2 Thresholding: Segmenting the regions of the image
2.3 Dilating the image: In cases like noise removal, erosion is followed by dilation. - Sudoku Extraction
3.1 Find Contours
3.2 Find Corners: Using Ramer Doughlas Peucker algorithm / approxPolyDP for finding corners
3.3 Crop and Warp Image: We remove all the elements in the image except the sudoku
3.4 Extract Cells - Interpreting the Digits
4.1 Import the libraries and load the dataset
4.2 Preprocess the data
4.3 Creating the Model
4.4 Predicting the digits - Solving the Sudoku
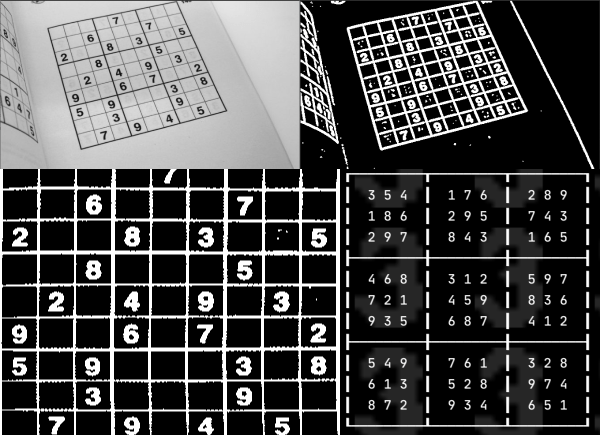
4. Interpreting the Digits
At the end of Part 2: Sudoku and Cell Extraction we had converted the image into a 2-D array of the images of the cells.
We will use Deep Learning and MNIST dataset for recognizing the digits. The MNIST dataset contains 60,000 small square 28×28 pixel grayscale training images of handwritten digits from 0 to 9 and 10,000 images for testing. So, the MNIST dataset has 10 different classes.
Top 4 Most Popular Ai Articles:
1. Natural Language Generation:
The Commercial State of the Art in 2020
4. Becoming a Data Scientist, Data Analyst, Financial Analyst and Research Analyst
4.1 Import the libraries and load the dataset
Before starting anything, make-sure Tensorflow is installed on your computer. We need to import all the modules that we are going to need for training our model. The Keras library already contains some datasets and MNIST is one of them. So we can easily import the dataset through Keras. The mnist.load_data() method returns the training data, its labels along with the testing data and its labels.
import keras
from keras.datasets import mnist
from keras.models import Sequential
from keras.layers import Dense, Dropout, Flatten
from keras.layers import Conv2D, MaxPooling2D
from keras import backend as K
# the MNIST data is split between train and test sets
(X_train, y_train), (X_test, y_test) = mnist.load_data()
4.2 Preprocess the data
The dimension of the training data is (60000, 28, 28). CNN accepts four dimensions. So we need to reshape the images to have dimensions (samples*pixels*width*height) and normalize the data.
# Reshape to be samples*pixels*width*height
X_train = X_train.reshape(X_train.shape[0], 28, 28, 1).astype('float32')
X_test = X_test.reshape(X_test.shape[0], 28, 28, 1).astype('float32')

# One hot Cpde
y_train = np_utils.to_categorical(y_train)
y_test = np_utils.to_categorical(y_test)
num_classes = y_test.shape[1]

# convert from integers to floats
X_train = X_train.astype('float32')
X_test = X_test.astype('float32')
# normalize to range [0, 1]
X_train = (X_train / 255.0)
X_test = (X_test / 255.0)
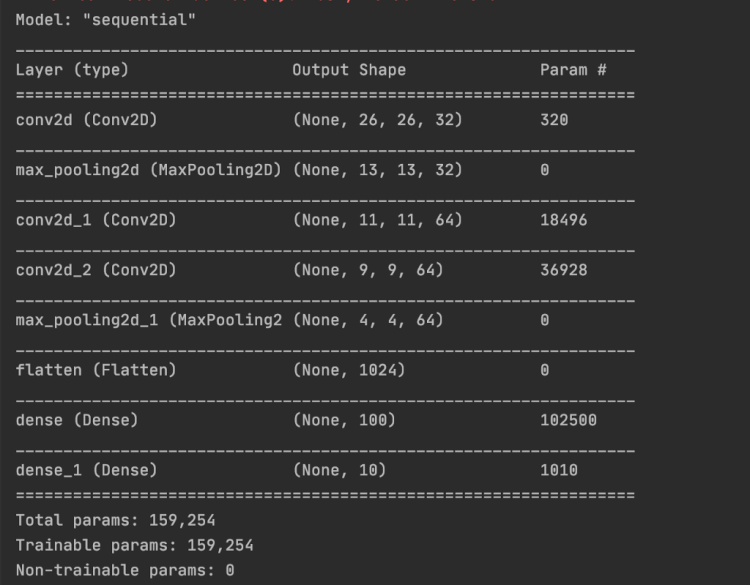
4.3 Creating the Model
model = Sequential()
model.add(Conv2D(32, (3, 3), activation='relu', kernel_initializer='he_uniform', input_shape=(28, 28, 1)))
model.add(MaxPooling2D((2, 2)))
model.add(Conv2D(64, (3, 3), activation='relu', kernel_initializer='he_uniform'))
model.add(Conv2D(64, (3, 3), activation='relu', kernel_initializer='he_uniform'))
model.add(MaxPooling2D((2, 2)))
model.add(Flatten())
model.add(Dense(100, activation='relu', kernel_initializer='he_uniform'))
model.add(Dense(10, activation='softmax'))
# model.summary()

# compile model
model.compile(loss='categorical_crossentropy', optimizer='adam', metrics=['accuracy'])
Our Model accuracy is 99.3. We will be save the model.
# save model and architecture to single file
model.save("model.h5")
print("Saved model to disk")
For more detail check out Deep-learning-project-handwritten-digit-recognition-using-python
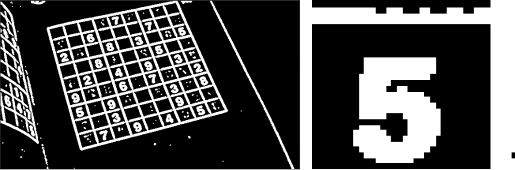
4.4 Predicting Digits
We need to preprocess the image and extract the number before making a prediction.
thresh = 128  # define a threshold, 128 is the middle of black and white in grey scale
# threshold the image
gray = cv2.threshold(image, thresh, 255, cv2.THRESH_BINARY)[1]

# Find contours
cnts = cv2.findContours(gray, cv2.RETR_EXTERNAL, cv2.CHAIN_APPROX_SIMPLE)
cnts = cnts[0] if len(cnts) == 2 else cnts[1]

for c in cnts:
    x, y, w, h = cv2.boundingRect(c)

    if (x < 3 or y < 3 or h < 3 or w < 3):
        # Note the number is always placed in the center
        # Since image is 28x28
        # the number will be in the center thus x >3 and y>3
        # Additionally any of the external lines of the sudoku will not be thicker than 3
        continue
    ROI = gray[y:y + h, x:x + w]
    # increasing the size of the number allws for better interpreation,
    # try adjusting the number and you will see the differnce
    ROI = scale_and_centre(ROI, 120)

    tmp_sudoku[i][j] = predict(ROI)

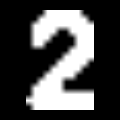
The predict function will take the number image. We will reshape it and make the prediction using our model.

def predict(img):
    image = img.copy()
    # image = cv2.cvtColor(image, cv2.COLOR_BGR2GRAY)
    # image = cv2.threshold(image, 140, 255, cv2.THRESH_BINARY)[1]
    image = cv2.resize(image, (28, 28))
    # display_image(image)
    image = image.astype('float32')
    image = image.reshape(1, 28, 28, 1)
    image /= 255

    # plt.imshow(image.reshape(28, 28), cmap='Greys')
    # plt.show()
    model = load_model('cnn.hdf5')
    pred = model.predict(image.reshape(1, 28, 28, 1), batch_size=1)
    # return pred.argmax()

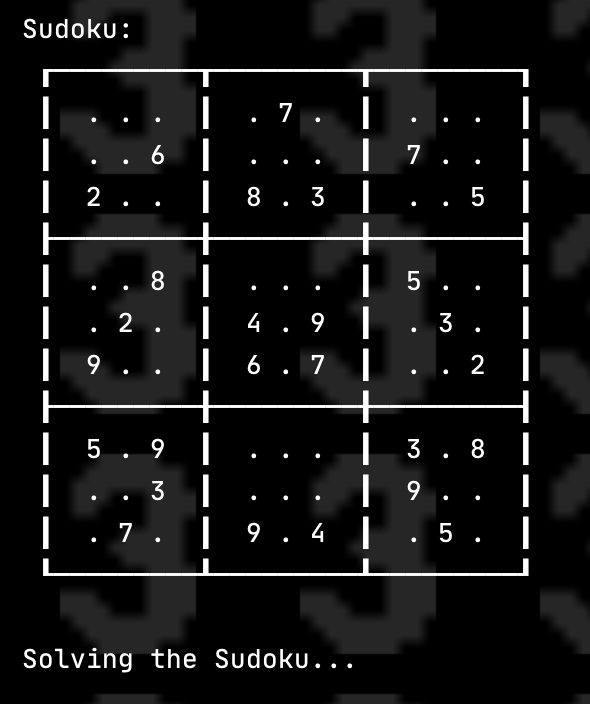
5. Solving the sudoku
We will be using Constraint Programming to solve the Sudoku. The python-constraint has features of adding constraints and variables to solve the problem. We will use constraint.Problem to create the Problem
import constraint
problem = constraint.Problem()
There are 4 constraints that we need to add in the the problem:
SYNTAX: addConstraint(which_constraint, list_of_variable_order)
- Every Row cell should have different value
for i in range(1, 10):
    problem.addConstraint(constraint.AllDifferentConstraint(), range(i * 10 + 1, i * 10 + 10))
2. Every column cell should have different value
# 2. Every column should have different value
for i in range(1, 10):
    problem.addConstraint(constraint.AllDifferentConstraint(), range(10 + i, 100 + i, 10))
3. Every sub-block cell should have different value
for i in [1, 4, 7]:
    for j in [1, 4, 7]:
        square = [10 * i +j, 10 * i + j +1, 10 * i + j +2,
                  10 *( i + 1 ) +j, 10 *( i + 1 ) + j +1, 10 *( i + 1 ) + j +2,
                  10 *( i + 2 ) +j, 10 *( i + 2 ) + j +1, 10 *( i + 2 ) + j +2]
        # ex: 11, 12, 13, 21,22,23, 31,32,33 have to be different
        problem.addConstraint(constraint.AllDifferentConstraint(), square)
4. Adding the numbers already in the sudoku
# 4. Adding the numbers already in the sudoku
for i in range(9):
    for j in range(9):
        if sudoku[i][j] != 0:
            # this is a constraint method. There are a lot of ways to add constraints this is one of them
            # it helps us check if the number is equal to the suodoku value
            # SYNTAX: addConstraint(which_constraint, list_of_variable_order)
            def constraint(variable_value, value_in_table = sudoku[i][j]):
                if variable_value == value_in_table:
                    return True

            problem.addConstraint(constraint, [(( i +1 ) *10 + ( j +1))])
The solutions can be calculated by using problem.getSolutions()
solutions = problem.getSolutions()
There can be multiple solutions, no solution, or one solution. The number of solutions is equal to the len(solutions) . We will use the first solution and store it in a 2-D array.
sudoku_solv =[[0 for x in range(9)] for y in range(9)]
solavble = False

# if there is no solution to the problem
if len(solutions) == 0:
    print("No solutions found.")
else:
    solution = solutions[0]
    solavble = True

    # Storing the solution in 2d array
    for i in range(1, 10):
        for j in range(1, 10):
            sudoku_solv[i - 1][j - 1] = (solution[i * 10 + j])

Thank you
Thank you for reading my article. Feel free to reach out to me if you have any questions. Check out the code at Sudoku_AI
Resources:
Other:
1.https://hackernoon.com/sudoku-solver-w-golang-opencv-3-2-3972ed3baae2
2. https://medium.com/@aakashjhawar/sudoku-solver-using-opencv-and-dl-part-1-490f08701179
Don’t forget to give us your ? !


Part 3: Solving the Sudoku was originally published in Becoming Human: Artificial Intelligence Magazine on Medium, where people are continuing the conversation by highlighting and responding to this story.
Via https://becominghuman.ai/part-3-solving-the-sudoku-ai-solver-13f64a090922?source=rss—-5e5bef33608a—4
source https://365datascience.weebly.com/the-best-data-science-blog-2020/part-3-solving-the-sudoku
