
In 6 simple steps
Neural network seems like a black box to many of us. What happens inside it, how does it happen, how to build your own neural network to classify the images in datasets like MNIST, CIFAR-10 etc. are the questions that keep popping up. Let’s try to understand a Neural Network in brief and jump towards building it for CIFAR-10 dataset. By the end of this article you will have answers to :
- What are neural networks?
- How to build a neural network model for cifar-10 dataset by using PyTorch?
What are neural networks?
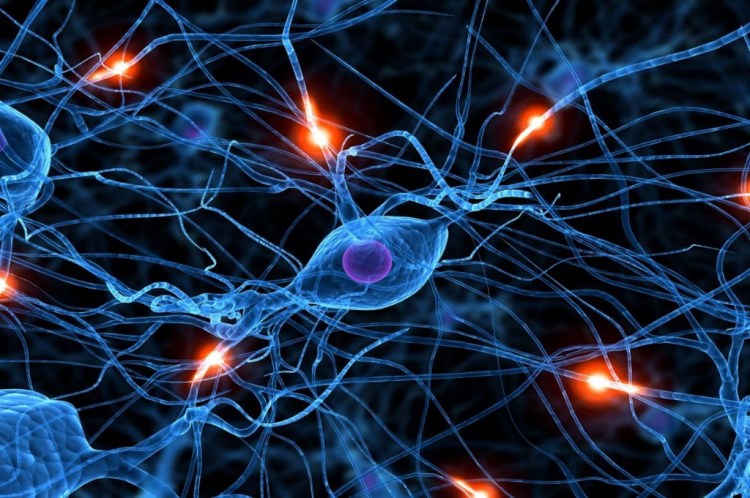
Neural networks(NN) are inspired by the human brain. A neuron in a human brain, individually is at rest until it collects signals from others through a structure called dendrites, when the excitation that it receives is sufficiently high, the neuron is fired up(gets activated) and it passes on the information. Artificial neural networks(ANN) are made up of interconnected model/artificial neurons(known as perceptron) that take many weighted inputs , add them up and pass it through a non-linearity to produce an output. Sounds simple!
Obviously, the perceptron isn’t a complete model of human decision making! But perceptrons can weigh up different kinds of evidence in order to make decisions. A neural network is made up of a input layer, a hidden layer and outputs layer which are made up of many perceptrons interconnected. Such network of perceptrons can engage in sophisticated decision making. It turns out that we can devise learning algorithms which can automatically tune the weights and biases of an ANN. We can add many hidden layers. A NN with multiple hidden layers is called a multi layer perceptron network aka. MLP. The terms NN, ANN and MLP can be used interchangeably.

What exactly is a NN trying to do? Just like any other machine learning model, it is trying to make good predictions. Now, instead of considering it as a black box, we can see it as an interconnection of neurons carrying bits of information and firing up of neurons relevant to the output(prediction). I encourage you to dig deeper about NNs as they never go out of fashion! Check out this video to understand more about neural networks.
Getting started !
Let’s get started with building our Neural Network (MLP) on the very famous problem of object classification using CIFAR-10 dataset. Here is a complete guide with code with various steps involved from downloading the dataset to building a base model to training and testing your model. Buckle up guys!
Building the neural network :
Follow the procedure given which I have broken down into 6 simple steps :
- Preparing and exploring the dataset
We need the following libraries and dependencies to start coding. Numpy deals with arrays, pandas with data-frames and torch with tensors.
If any of the above import fails, you can run the following command to install the modules.
!conda install numpy pandas pytorch torchvision cpuonly -c pytorch -y
Exploring the dataset
Before staring to work on any dataset, we must look at what is the size of dataset, how many classes are there and what the images look like. Here, in the CIFAR-10 dataset,
- Images are of size 32X32X3 (32X32 pixels and 3 colour channels namely RGB)
- There are 10 classes.
- The dataset consists of 60000 with 6000 images per class .
- There are 50000 training images(this means we get 5000 images per class for training our NN) and 10000 test images.
We can download the dataset train and test datasets as follows:
As we will be working with tensors in PyTorch, we have transformed the dataset into tensors using transform=ToTensor() parameter.
The size of training and test datasets can be checked as shown below:
We can enlist the 10 classes in the dataset as:
The next step in exploring the dataset would be :
- Check the size of the tensors formed from the images.
- Display the images, and see for yourself how difficult it is even for a human to recognize the object in the image with the resolution of 32X32X3.
Notice that the PyTorch tensor’s first dimension is 3 i.e. the colour channels, but to display an image for which we are using matplotlib take this channel dimension as its last dimension, so we will be using the permute function to shift the dimension.
Data preparation for training
There is one more set we need other than training and testing sets to check the validity(accuracy) of network before using it for inference, called the validation set. The validation set is required for parameter selection and to avoid over-fitting.
Trending AI Articles:
1. Machine Learning Concepts Every Data Scientist Should Know
3. AI Fail: To Popularize and Scale Chatbots, We Need Better Data
It may happen sometimes, that if you train your model on a training set only, you get very good accuracy and over-fit leading to very poor performance on test set. Thus, we use a validation set of 5000 images(this may vary). Here 10% of the training dataset has been used as the validation set. We have used a torch.manual_seed(seed), it will set the seed of the random number generator to a fixed value, so that when you call for example torch.rand(5) (a random fucntion), the results will be reproducible.
We use the random_split() function to split our dataset into the training and validation sets as follows :
For training our model we need to form batches of images from our dataset, so we will be using the DataLoader() function provided by PyTorch. Read the documentation for the detailed explanation of parameters. DataLoader gives us a dynamic environment to create the batches and makes our data easily iterable.
2. Base model structure
Now, we will create a generic basic model for solving our classification problem. This model can be extended to solve any classification problem not just CIFAR-10. We will be building on top of the nn. Module class already provided by PyTorch, it contains the initialization and forward methods.
Here, we have defined the evaluate function that is used for the validation step. We have already seen why we need the validation accuracy.
We also define the fit function in which we define our training loop(forward pass and backward pass, calculating loss and optimizing the loss function), and different hyper-parameter are given to this fit function like the epoch, learning rate and optimization function(which by default we have set to SGD(Stochastic gradient descent)).
The loss function used is the cross-entropy loss which has in-built negative log likelihood loss and softmax also, which can be easily used for the classification task.
3. Use of GPU(Graphics processing unit) in processing data
As training a neural network will be time and resource consuming, we may use GPUs instead of CPUs for training our network, as it will be faster and the CPU will be free to perform other processes. Modern GPUs provide superior processing power, memory bandwidth and efficiency over their CPU and are faster in tasks that require multiple parallel processes, as required in machine learning. Here is the process you might follow if you have GPU :
As you can see, I have nvidia GPU available so the device shows type = ‘cuda’. You can use Google Colab if you do have a graphics card in your machine.
The data can be transferred to the GPU as shown. We will be doing it in batches(we won’t transfer the whole dataset at a time), as it will save the memory, or it might happen that your whole training set doesn’t fit into the GPU.
4. Defining the architecture of the model
We are defining one more class here, to define our architecture(layers in the model).
I have used a five layer model and ReLU(Rectified Linear Unit) function, a non-linear activation function that has gained popularity in the deep learning domain. The main advantage of using the ReLU function over other activation functions is that it does not activate all the neurons at the same time. This means that the neurons will only be deactivated if the output of the linear transformation is less than 0. I have used a deep model, you can experiment with the architecture and chose the one that works best for you.
Now, we will calculate the accuracy of our model, so that we can see what happens when the weights are random.
We observe that the accuracy is approx. 10%, as there are 10 classes the accuracy with random initializations cannot be expected more than this.
5. Training the network and hyper-parameter tuning
Let’s train our model for 10 epochs and with a learning rate of 0.01 and with Adam optimizer.
Some of the observations that can be made are :
- When I trained the model using SGD, it was slow as it oscillates when there are deep sides. But using Adam(Adaptive Moment Estimation) the learning was better and fast, it took less number of epochs to train the network, its adaptive learning rate, bias-correction and momentum make it a good choice.
- Initially I have used a high learning rate as the learning in the beginning is coarse, and it might help find the optimal learning rate. As we can see the accuracy is increasing, the learning rate worked for some epochs. We have moved closer to the minima.
- Now, we lower the learning rate, do fine tuning for some epochs and stop our training when we see that there is no further change in the accuracy. I have done manual tuning of learning rate. But, there are learning rate schedulers which can do this job for you.
- You can change the number of epochs, more epochs means more training.
- Plot the loss and accuracy graphs using matplotlib.

6. Testing the model
This is the last step. We check the accuracy of our model on test images.
Yay! Accuracy of 53% ?. This means our model predicts the object more than 50% of the time correctly. This can be further improved by using a different architecture of more hyper-parameter tuning. I have provided a link to my complete notebook in the references. Give it a try!
We get a low accuracy because our NN is not looking at the image as a whole, but individual pixels. It doesn’t capture the spatial invariance. This can be done using Convolutional Neural Networks(CNN).
References
- Read about how neural networks can learn any function.
- CIFAR-10 dataset
- My notebook
- Link to the image (firing neurons)
Don’t forget to give us your ? !


Build your own Neural Network for CIFAR-10 using PyTorch was originally published in Becoming Human: Artificial Intelligence Magazine on Medium, where people are continuing the conversation by highlighting and responding to this story.
